
Adobe Lightroom CC Guide
1
Overview of Adobe Lightroom CC
Overview of Adobe Lightroom CC
Adobe Lightroom CC is an all-in-one photo service that allows you to access, edit, organize, and share
your photos from your computer, mobile device, or web browser. The changes you make on one
device automatically synchronize so you can access the latest photo edits from anywhere (Figure 1).
Lightroom CC makes it easy for you to add, view, edit, and share your photos from any of your devices at home, school,
and beyond. When you add new photos to the app, all your devices are automatically updated. Tap the camera icon to
take a photo with the in-app camera. Edit full-resolution photos on mobile devices, the web, or your desktop and see
the changes applied everywhere else. Keep your collection organized with keywords, albums, and folders. Share your
photos to web galleries, slideshows, and social media. Open photos in Photoshop from Lightroom CC when you need
to do advanced image editing, retouching, adding graphics or text, or using your photos in other creative projects.
This guide is a quick introduction to the Lightroom CC interface, and how you can add images to the library. In other
guides in the series, you’ll learn the basics of how to edit, organize, share, and use Lightroom CC images in Photoshop.
Figure 1 Synchronized photos across your computer and mobile devices

2
Overview of Adobe Lightroom CC
What you’ll need
When you first launch Lightroom CC, you’ll see a default image collection in the workspace. You can follow along using
those photos or download the assets used in this and the other Lightroom CC guides in this series. You can also work
through the steps using your own photos.
These guides use both the Lightroom CC desktop and mobile apps. If you haven’t already done so, create and/or sign
in with your Adobe ID and download the apps for desktop and mobile devices:
• Lightroom for desktop
• Lightroom CC for iPhone
• Lightroom CC for iPad
• Lightroom CC for Android
Exploring the workspace
If it’s your first time opening Lightroom CC, the workspace will display the Marina visit collection of photos (Figure 2).
Here’s an overview of the main elements that make up the desktop workspace:
• Photos and albums Import photos from your computer or a connected device, and sort into albums.
• Search bar and Filter Find photos by metadata and keywords in the Search bar, or click the lter icon to
search by rating, keywords, and other seings.
• Sharing Save photos to the desktop, or share via Facebook.
• Cloud Provides updates on storage, links for device connections, and sync status.
• Tools panel Access photo edit controls like Light, Color, Eects, Detail, Optics, and Geometry. Other tools
include Crop & Rotate, Healing Brush, Paint Brush, Linear and Radial Gradients.
• View mode Display photos in a thumbnail grid, square grid with status info, or individual detail view.
Figure 2 Lightroom CC desktop interface
Photos
and
albums
Search bar
Tools
panel
View mode
Flag and Rating Zoom
Filter
Cloud
Sorting
Keywords
and Info
Sharing

3
Overview of Adobe Lightroom CC
• Sorting Provides options to display by capture, import, or modied date, or by star rating.
• Flag and Rating Apply ags to pick and star to rate individual or groups of photos.
• Zoom Change image sizes for thumbnail, grid, or detail view modes.
• Keywords and Info Use these panels to apply title, caption, copyright, keywords, and other information to your
photos.
The Lightroom CC mobile workspace shares many of the same features and tools, panels, and settings but arranged on
different screens and optimized for devices (Figure 3).
Note: The Lightroom for mobile interface may vary slightly depending on the version of the Lightroom app you have
and whether you’re using it on iOS or Android.
Get started using Lightroom CC
Adding photos to Lightroom CC involves a few simple selecting and importing steps. When an image is added,
Lightroom CC makes a copy of the photos imported and uploads your full resolution original photos to the cloud. Once
you’ve imported the photos, you can consider deleting or moving the originals from their source, such as the memory
card. When you add photos to Lightroom CC, they’re automatically available on all your devices. Lightroom sorts
photos by the date on which they were taken.
In this section, you add photos from a computer, camera, and/or mobile device, and then view your photos on other
devices.
Figure 3 Lightroom CC iOS mobile interface
4
Overview of Adobe Lightroom CC
To add photos to Lightroom CC:
1. Start Lightroom CC and sign into your account on
both your desktop and mobile devices.
2. Follow these steps to select photos from your com-
puter, a connected camera, or mobile device and add
them to Lightroom CC.
To add photos from your computer:
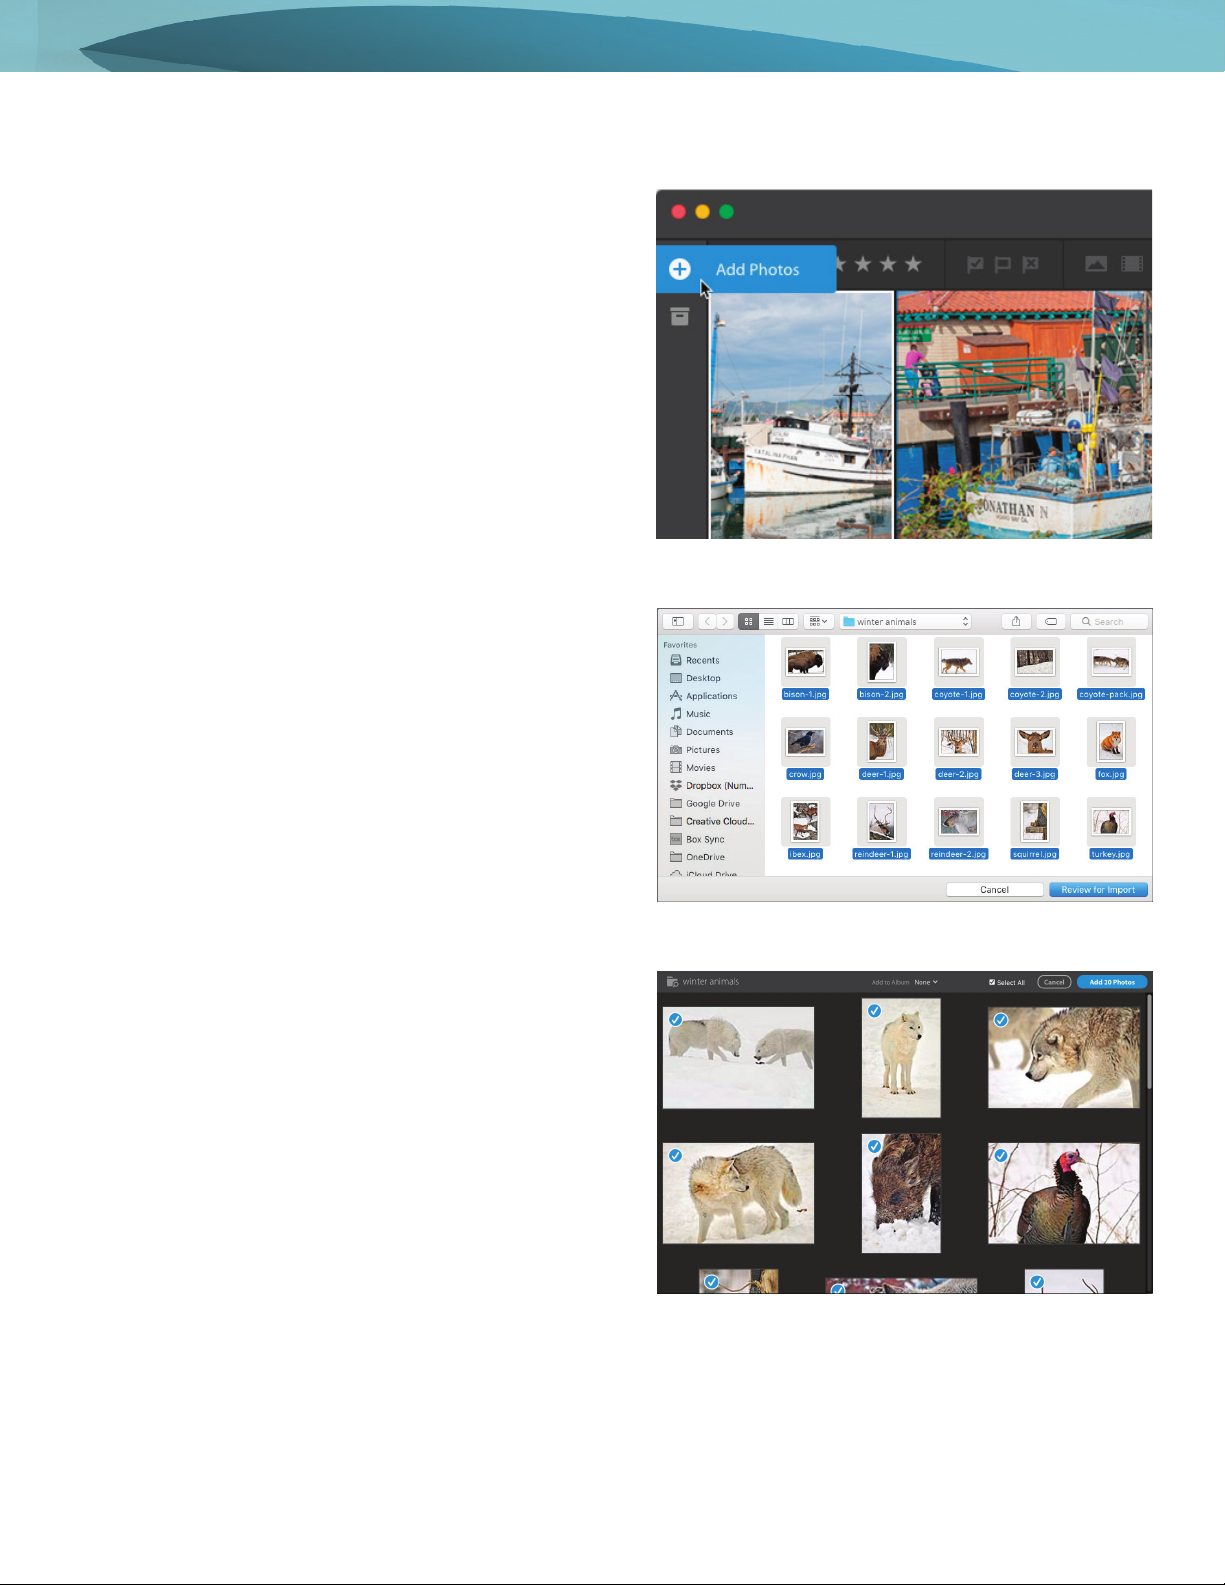
• Click the + Add Photos buon in the upper le
(Figure 4) and browse to the location of the
downloaded sample photos, or your own photos
accessible on your computer.
• In the Import dialog box that opens, select the
images or folders you want to add, and then click
Review for Import (Figure 5).
• You’re looking at previews of your images
(Figure 6). In this screen, you can select the
images you’d like to add to Lightroom CC. Click
to uncheck any photos you don’t want to include,
and then click Add Photos.
To add photos from a camera device:
• Connect the camera or card reader to your
computer.
• Click the + Add Photos buon at the upper-le
corner of the window (Figure 4).
• In the Import dialog box that opens, select the
images or folders you want to add, and then click
Review for Import (Figure 5).
• You’re looking at previews of your images
(Figure 6). In this screen, you can select the
images you’d like to add to Lightroom CC. Click
to uncheck any photos you don’t want to include,
and then click Add Photos.
Figure 4 The + Add Photos button
Figure 5 The Import dialog box
Figure 6 Import previews
5
Overview of Adobe Lightroom CC
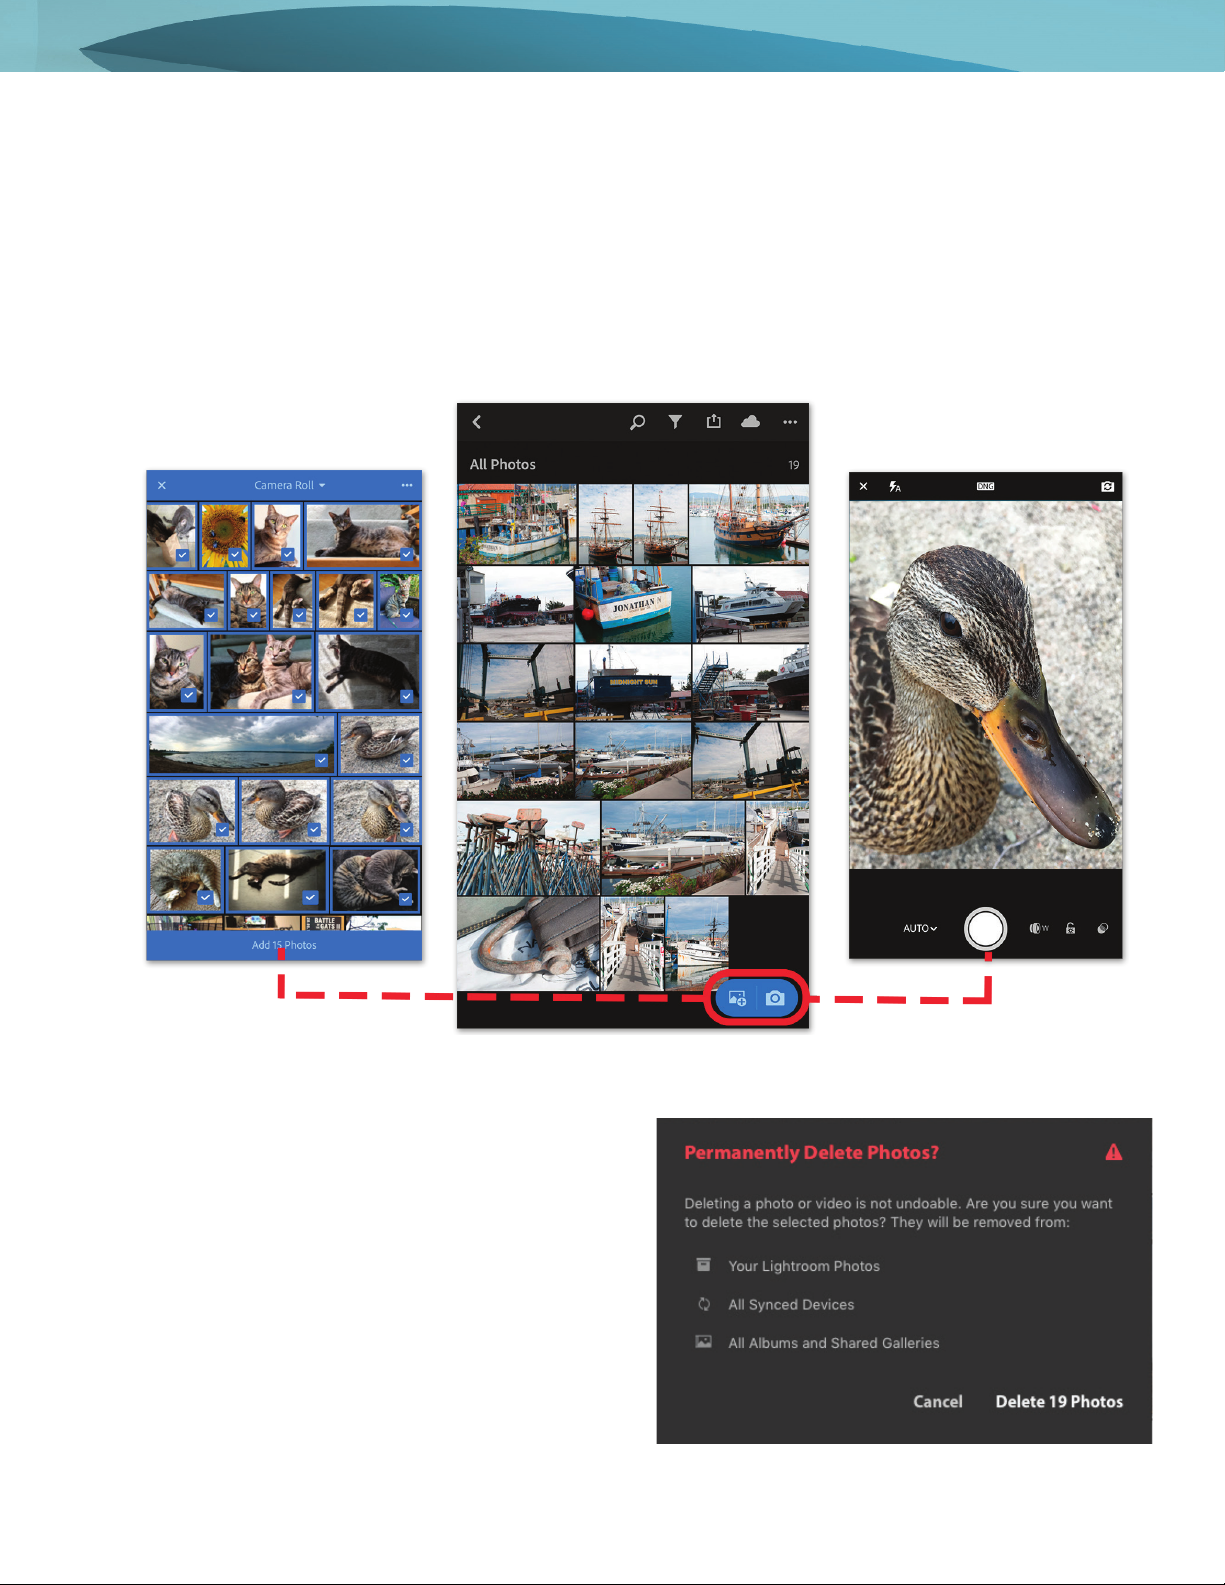
To add photos from your mobile device:
• Tap the Add Photos icon, then Camera Roll. Or, tap the camera icon to take a photo with the in-app camera
(Figure 7).
• Select the photos on your mobile phone you want to add — tap individual thumbnails, or swipe across
images to select multiple photos.
• Once you’ve made your selections, tap Add Photos to import them.
Your recently added photos are displayed in Photo Grid.
3. (Optional) If you want to remove the default set of
Lightroom CC images, return to the All Photos screen
in the desktop app and Ctrl-click (Windows) or
Command-click (Mac OS) and select the images, then
choose Edit > Delete Photos.
A dialog box opens asking if you want to permanently
delete photos (Figure 8). If so, click Delete Photos to
remove the photos.
4. When you’re nished editing the Lightroom CC library
on the desktop, check your photo collection on your
mobile device.
Your photo library is now synchronized.
Figure 8 Permanently Delete dialog box
Figure 7 Adding photos from a mobile device controls
Camera Roll In-app camera

6
For more information
Get instant access to free courses, workshops, &
teaching materials and connect with the creative
education community on the Adobe Education
Exchange: https://edex.adobe.com/.
Adobe Systems Incorporated
345 Park Avenue
San Jose, CA 95110-2704
USA
www.adobe.com
Adobe and the Adobe logo are either registered trademarks or
trademarks of Adobe Systems Incorporated in the United States
and/or other countries. All other trademarks are the property of
their respective owners.
© Adobe Systems Incorporated. All rights reserved.
is work is licensed under a Creative Commons Aribution-
Noncommercial-Share Alike . Unported License.
Migrate photos and videos from Lightroom Classic CC to Lightroom CC
If you’ve already used a previous version of Lightroom, you might know that the application now comes in two distinct
flavors:
• Lightroom CC, an all-in-one service where your photos are stored in their full resolution centrally in the cloud,
and synced with your computers and devices when you’re working on them.
• Lightroom Classic CC is a database application containing a catalog and records for each of your photos and
videos you may have imported. A record in the catalog includes a reference to where the photo lives on your
system; your instructions for processing the photo—for instance, the adjustments you applied; and photo
metadata, such as keywords and ratings.
You can easily migrate your catalogs from Lightroom Classic CC to Lightroom CC (Figure 9). When you do so,
Lightroom CC brings in each of your photos included in the catalog and uploads it to the cloud in its full resolution for
access across multiple devices and computers. Later, to save on disk space, you can even consider deleting those
photos from the local storage on your device.
Figure 9 Migrating photos from Lightroom Classic CC to Lightroom CC
When migration is complete, Lightroom CC displays a confirmation dialog. You can now edit, organize, and share your
photos using Lightroom CC and take full advantage of the power of device synchronization and cloud computing.
To learn how to how to transition you photos, please see Adobe Help Migrate photos and videos from Lightroom
Classic CC to Lightroom CC.

'